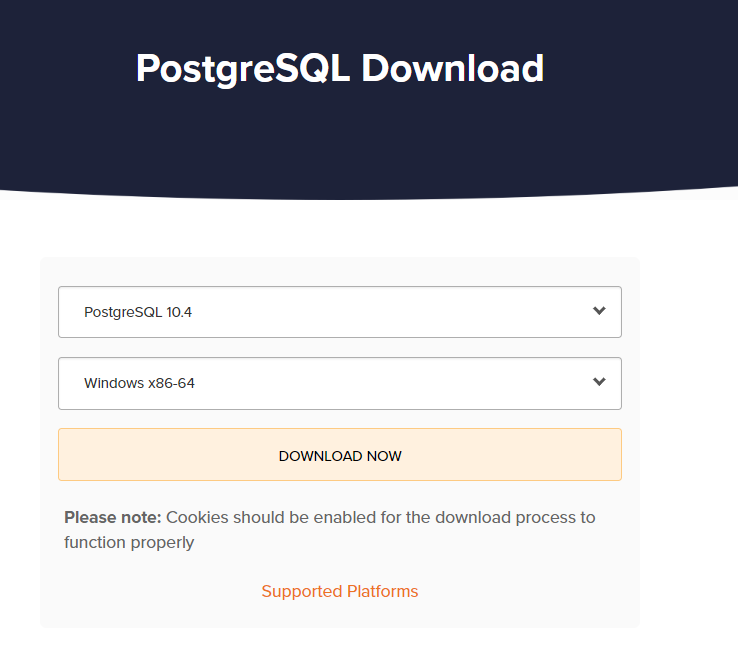
1. Download the latest stable version of PostgreSQL. The package I prefer (as it includes the stackbuilder and pgadmin) can be found here: https://www.enterprisedb.com/downloads/postgres-postgresql-downloads
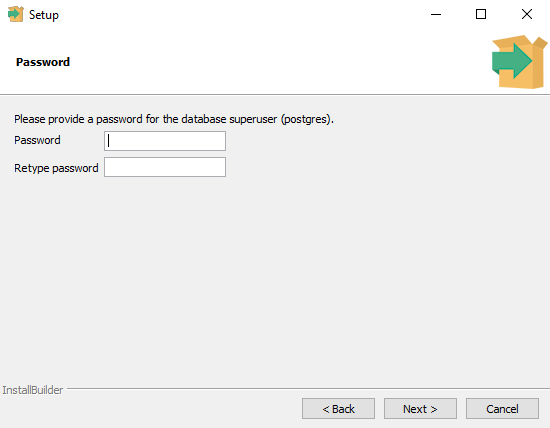
2. Launch the .exe installer and follow the steps. You can leave all the pre-filled settings as is. Make sure to remember the password you type in here as we will need it later.
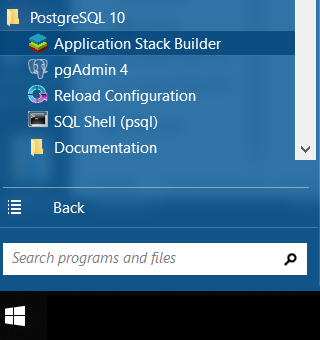
3. Once installed, lauch the Application Stack Builder (Start => All Programs => PostgeSQL xx => Application Stack Builder.
4. Choose your PostgreSQL installation.

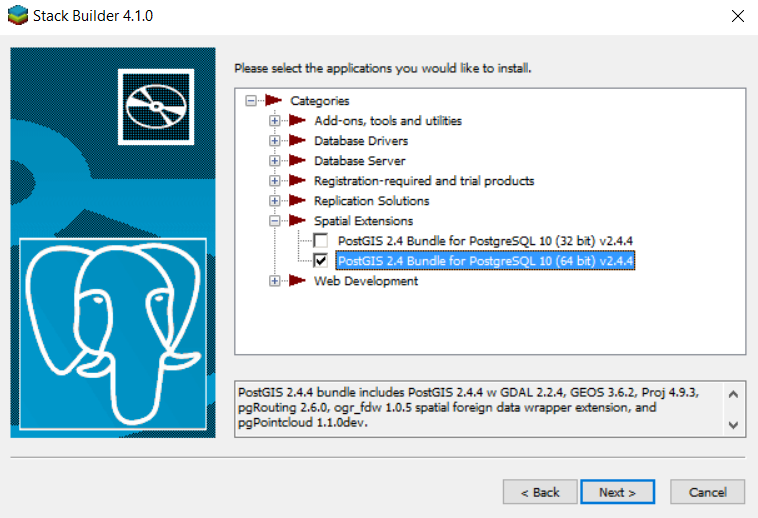
5. Select PostGIS as an application to install (Categories => Spatial Extensions => PostGIS ….)
6. Keep clicking next. Stackbuilder will download the PostGIS extention and start the installation.
7. Agree with the Licencse Agreement of the PostGIS Bundle.
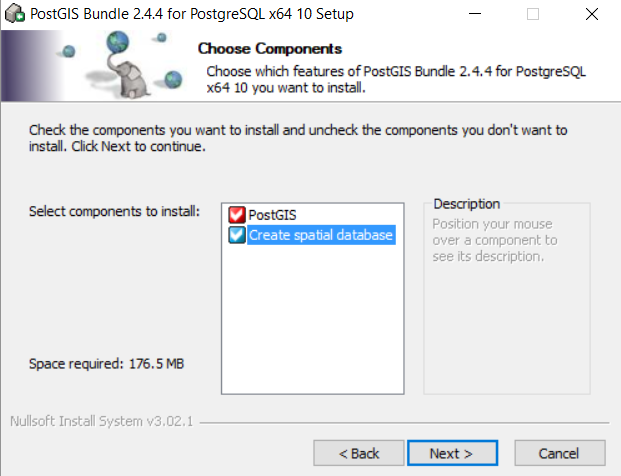
8. Select ‘Create spatial database’
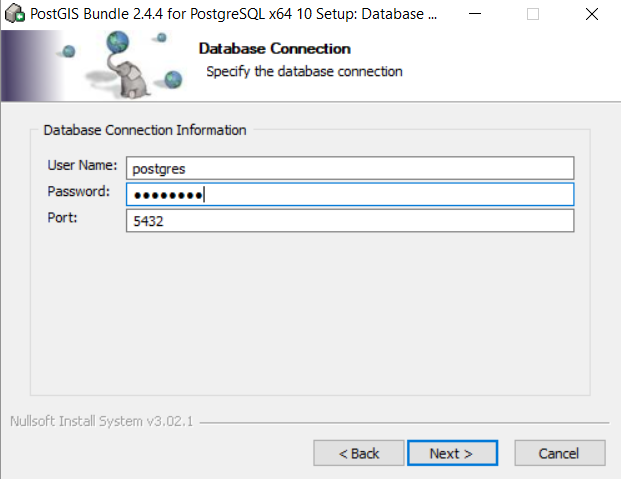
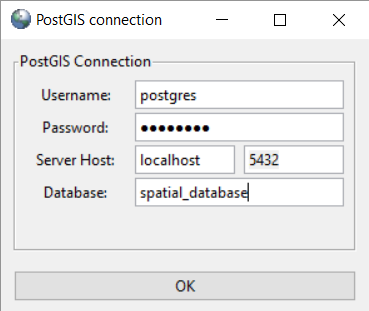
9. Connect to your PostgreSQL database. The standard User Name created during the installation is ‘postgres’. The password is the one you choose during the installation of PostgreSQL The standard port for PostgreSQL is ‘5432’.
10. Enter the name of your first PostGIS database. I will call it ‘spatial_database’.

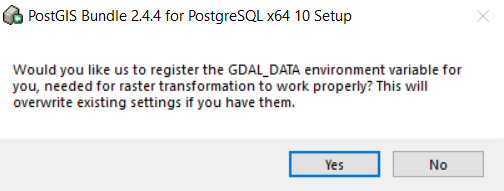
11. PostGIS wil ask you if you like to set the GDAL_DATA environment variable. If you already have a GDAL installation feel free to click no. Otherwise click yes.
12. Click yes for the following two questions.
13. Once completed close the PostGIS installation and finish the stack builder
Congratulations! You now have a running PostGIS database. Let’s upload some data.
PostGIS includes a shapefile uploader. I will upload a shapefile of Dutch camping areas:
https://www.earder.com/wp-content/uploads/2018/06/Top10NL_funcgebied_camping_kampeerterrein-shp.zip (source: Top10NL, Kadaster). But feel free to choose your own.
Now let’s upload it to the PostGIS database.
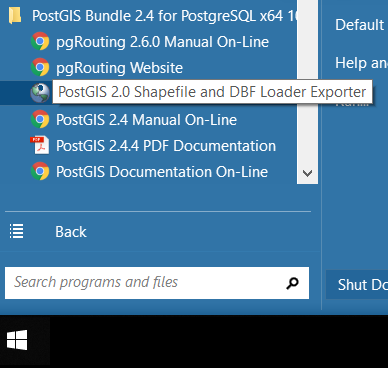
14. Open the PostGIS Shapefile Import/Export Manager (Start => PostGIS Bundle … => PostGIS 2.0 Shapefile and DBF Loader Exporter).
15. Click on ‘View connection details…’
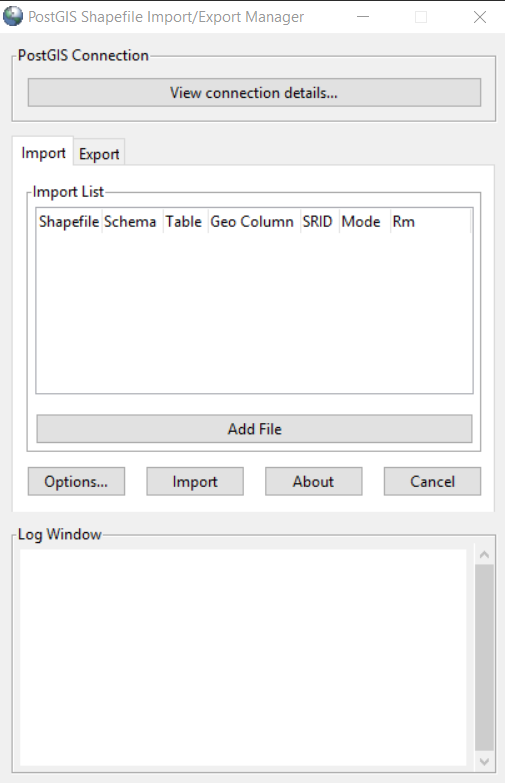
16. Enter your username (standard is ‘postgres’), the password you entered during the installation of PostgreSQL, the port (standard is 5432) and the PostGIS database name.
17. Click on ‘Add File’ and select your shapefile.
18. Now click on ‘Import’ to upload the file.

If all went well you now have uploaded spatial data to your own PostGIS database.
Let’s see what that looks like. For this we can use pgAdmin.
19. Open pgAdmin (Start => All Programs => PostgeSQL xx => pgAdmin 4)

20. Your standard browser will open and go to the following URL: http://127.0.0.1:60344/browser/
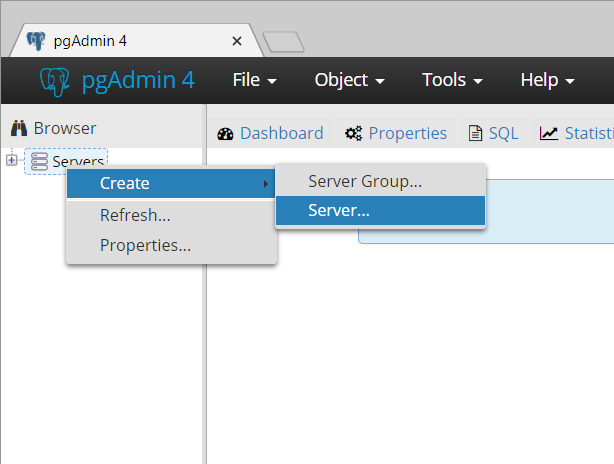
21. Right-click on ‘Servers’ => ‘Create’ => ‘Server…’
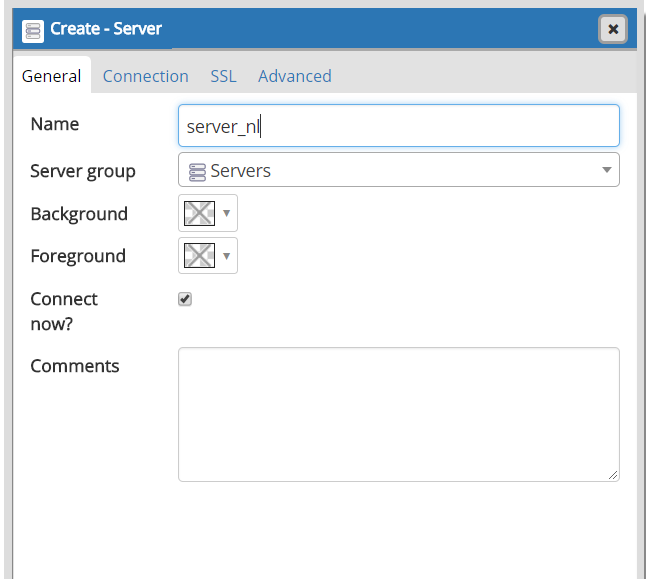
22. Under the tab ‘General’ enter the name you want to give to this server. I will call mine ‘server_nl’, but feel free to picky your own name.
23. Under the tab ‘Connection’ fill in ‘localhost’ for the Host name/adress and add the Password if you entered one during the installation of PostgreSQL.

24. Click ‘save’.
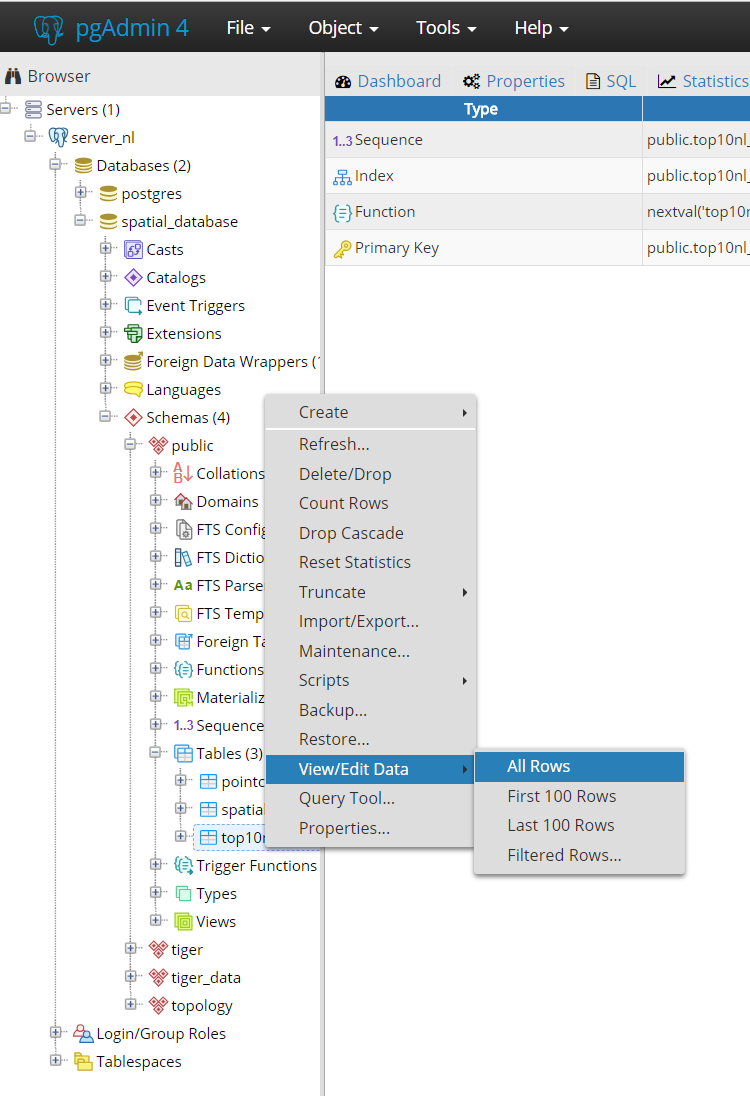
25. Now can see our server on the left hand side. Expand the server => ‘spatial_database’ (or your database name) => ‘Schemas’ => ‘public’ => ‘Tables’ => ‘top10nl_funcgebied_camping_kampeerterrein’ (or the name of the shapefile you have uploaded). Right-click on the this shapefile name and choose ‘View/Edit Data’ => ‘All Rows’.
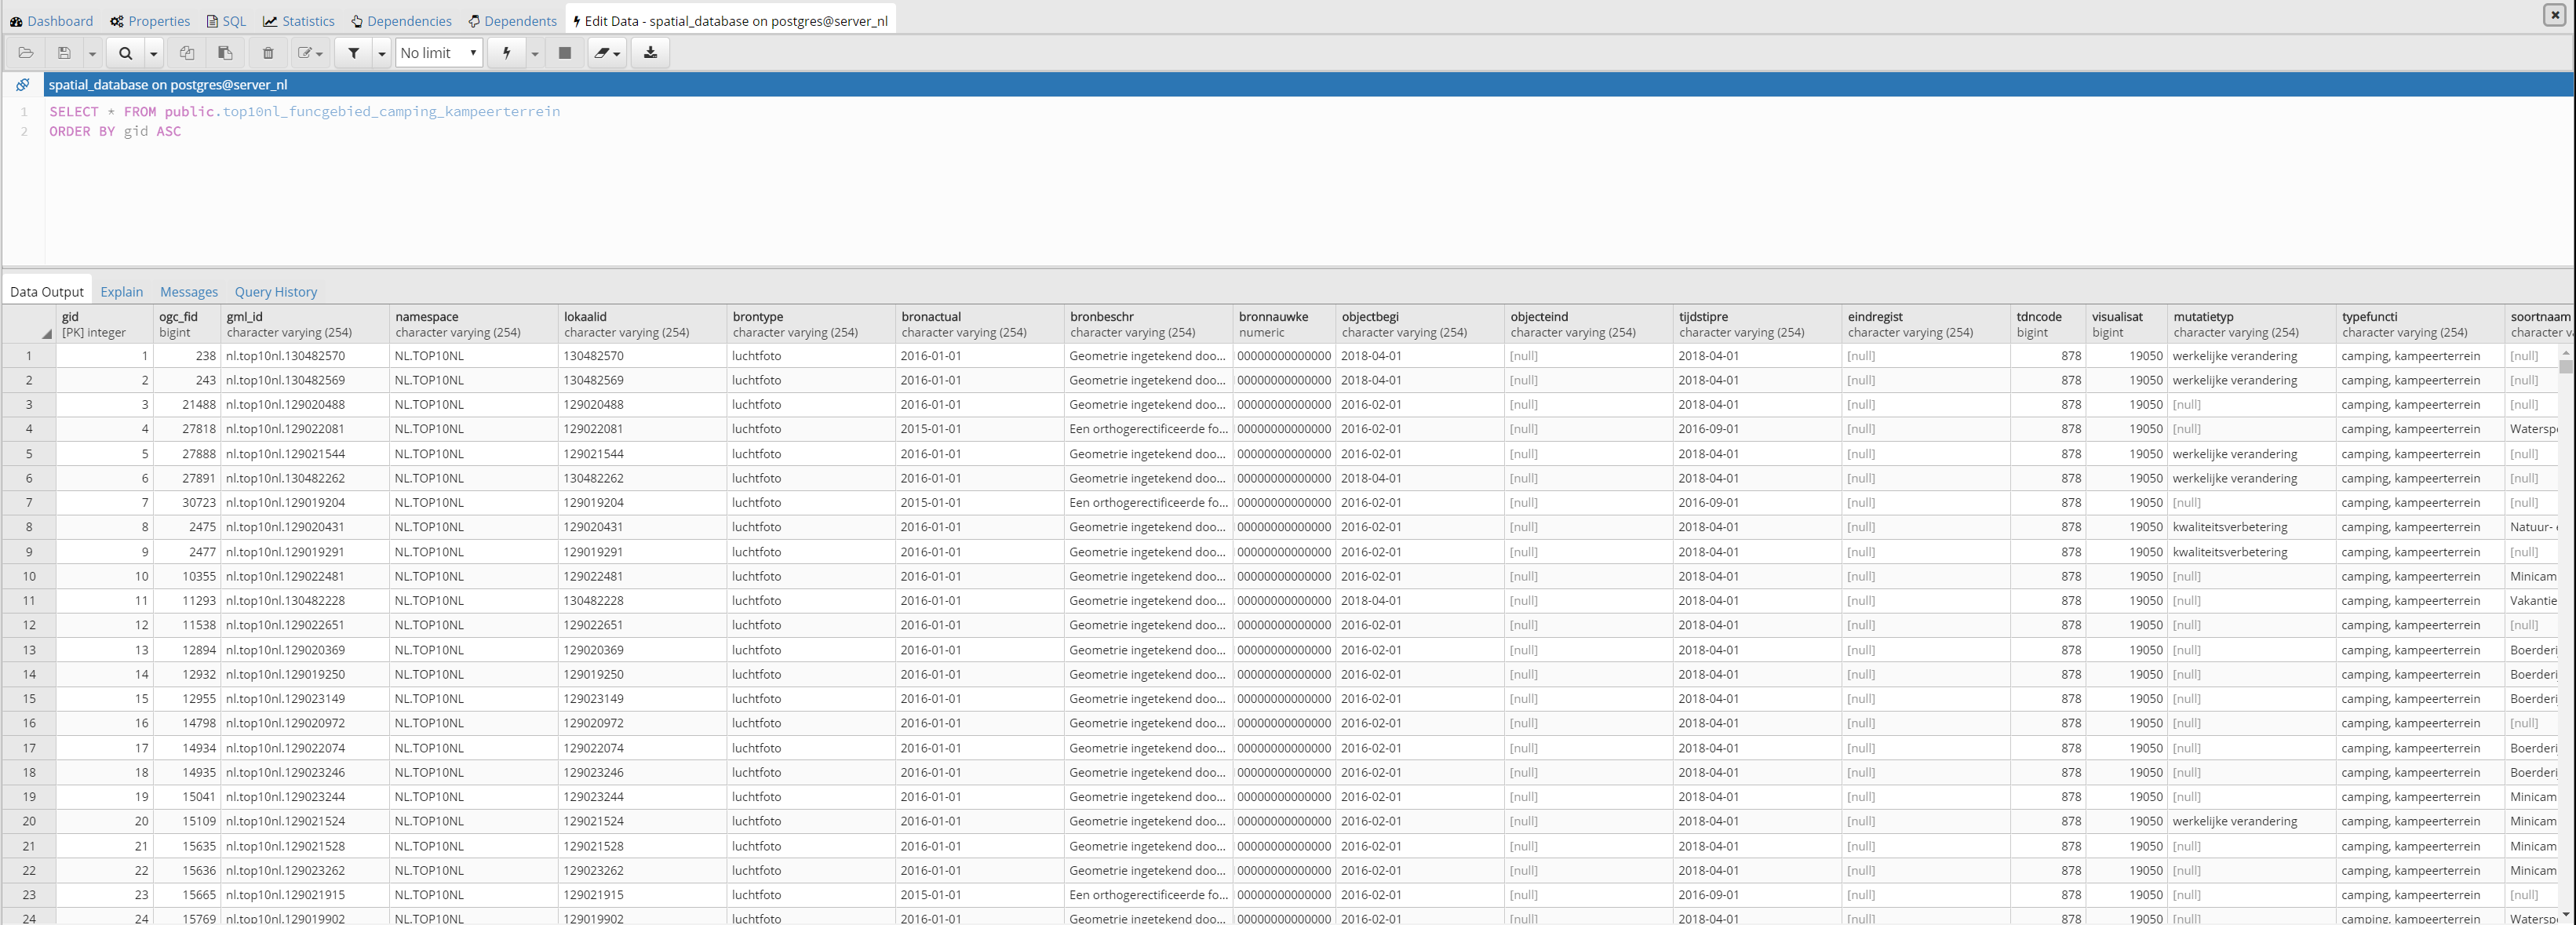
26. We can now see all the data that is in this PostGIS table.
If all seems well we can move ahead and start using this our PostGIS data in GeoServer.